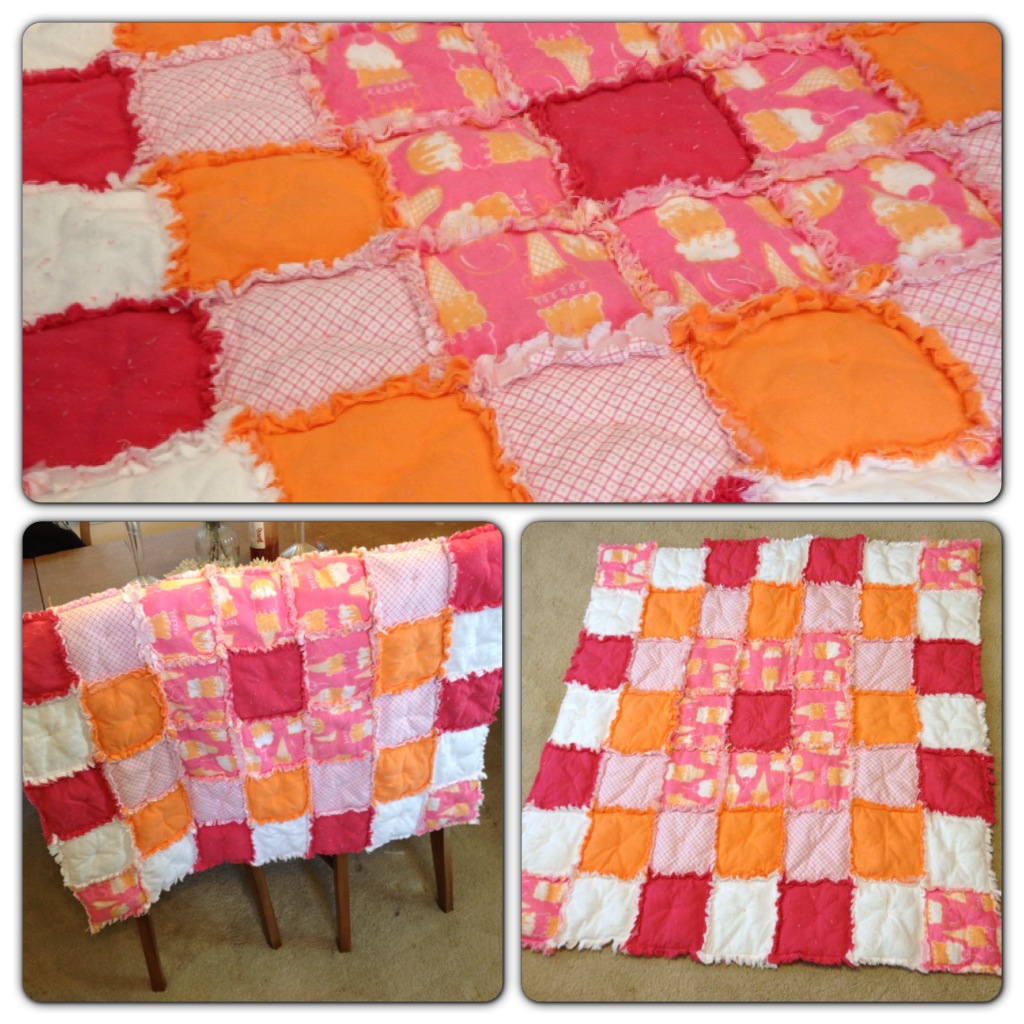
So I've made a few of these now and each time I forget how much work is involved! But the end result it totally worth it!
The ones I made before were queen size and I used 2 yards of each kind of fabric. This one was meant to be smaller since it is for a tiny human. I only got about 1 yard of each kind of fabric. I used all flannel for this one and I really think that turns out better, but you can use anything else, just as long as its cotton. If you don't know how much fabric to get, just figure out how many squares you want it to be and how big each square should be. I cut my squares to 6x6 and it ended up being 7 squares x 7 squares, so 42"x42". You will also need batting. I got 100% polyester batting, but I don't really love working with it. If you can get the softer bamboo batting, it is MUCH better. Cut those squares too, 1" less than your fabric squares.
1. Sandwich the batting between two fabric squares and lay out your pattern. The hubby and I went through a couple different options before we settled on a good lay-out.
2. Sew each square sandwich together. Usually, you would use your machine and sew a big X in the middle of each one. I didn't want to do that for this quilt, so I just hand-stitched a tiny little x in the middle and it worked just fine. The point is for each square to hold together.
3. Once your squares are put together, you are ready to put together your rows. Just follow the pattern you decided on. I recommend taking a photo of that like I did, so you have a good reference in case your squares get mixed up, which mine did.
Since you want the rough edges to show, sew them "backs" together along one edge. Keep going with each square until you have a row. Then do the rest of the rows.
4. Follow the same instructions, but now you are sewing the rows together. Make sure to match up the squares as much as possible. If they are a little off, it's fine. It'll turn out OK when you do the "rag" step.
I would recommend giving yourself a lot of room for this, especially if you are doing a larger quilt. You will need room to feed through the sewing machine and you'll need room to the left as you add each row. I was fine for this smaller quilt, but when I made the queen size, I had to have my hubby hold onto the overflow.
5. Once you have all the rows sewed together, do a final stitch around the outer edge of the quilt to close it out. You can use a regular straight stitch, but I like to use the zig-zag stitch. It holds it nicely and provides a decorative element since it will be seen.
6. This is the worse part, I'm not going to lie. You need to go around and cut little snips out of all the raw edges you have exposed. All the way around the outside and each square inside. This takes awhile and more often than not, my index finger will get a small blister and start to go numb. Again, this is where it helps to have someone available to take over if you can. Usually I get the hubby to help, but this time my 3-year-old eager beaver helper wanted in. Since I was using my big fabric scissors and not his usual safety scissors, I did it with him for a couple squares before he gave up. He really wanted me to share though. ("You don't have your scissors here, JJ." "Share, mommy. Please." I couldn't say no...)
7. Last step! Wash your quilt. When you wash and dry it, all those exposed edges start to curl up and get all raggy. Hence "Rag Quilt"! It is a cute way to make a quilt and pretty easy not to mess up. I'm a really lazy pinner and measurer so this is perfect for me!


 6
6


No comments:
Post a Comment