Showing posts with label diy. Show all posts

Wednesday, May 22, 2013

Boppy Covers

I wanted cute boppy covers so I decided to make my own.

I used my old boppy cover from when JJ was a baby as a pattern.  I lfolded my material in half since you need two sides and cut around the old cover, leaving about a 1/2" for a seam allowance. 
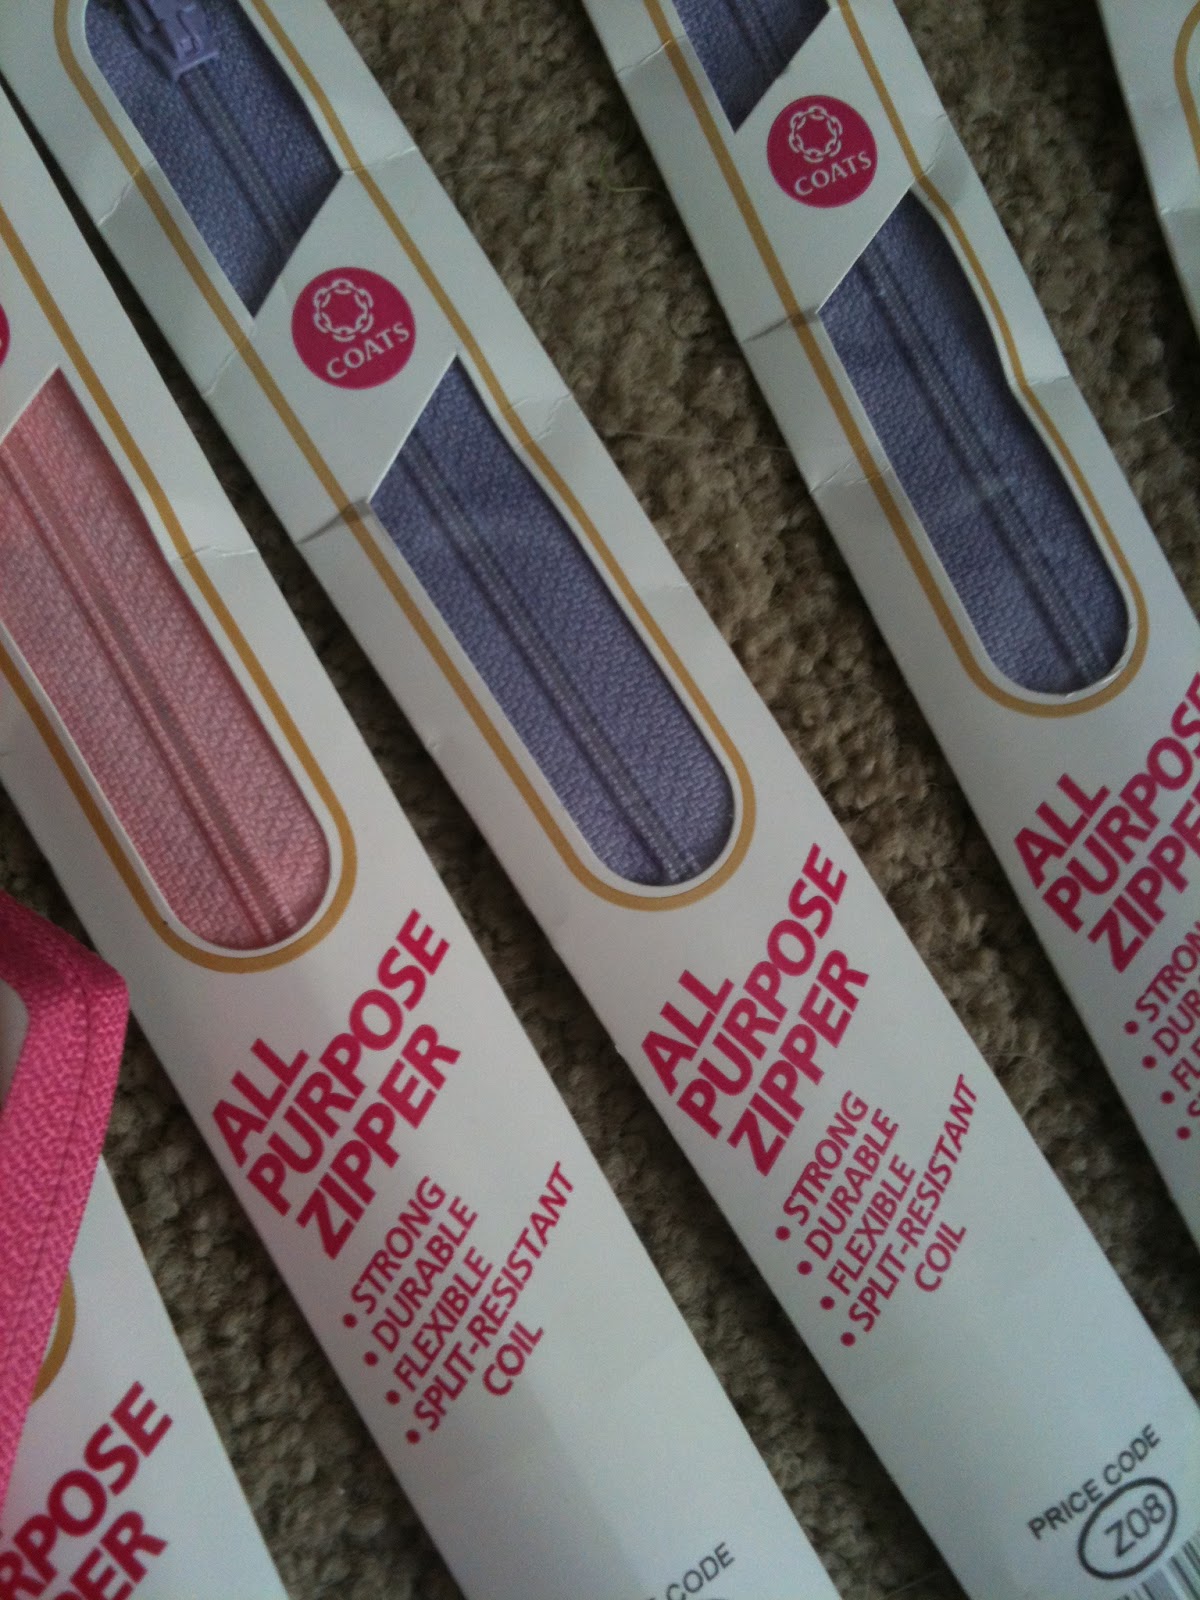
Measure from the top of your pattern cover to the zipper and make that some cut on one piece of your fabric. (Trust me when I say just do one piece. I'm not going to tell you how I know it is a total pain to try to sew back together the piece that wasn't supposed to be cut.)
Now sew on your zipper. Open the zipper and sew one side of the zipper to one side of your fabric then do it again for the other side. Just make sure your zipper is facing the right way.


Then put your two fabric pieces, right sides together and sew all the way around. Since you have the zipper now, you don't need to leave yourself a place to turn it right side out when you are done. Make sure your zipper is closed for this step and make sure you catch the ends of the zipper on your way around.

 Turn the cover right side out and put it on your boppy! They are so easy to do; I made 5 in one afternoon! And they can be whatever material you want. No reason not to do it!! :0)


Rag Quilt

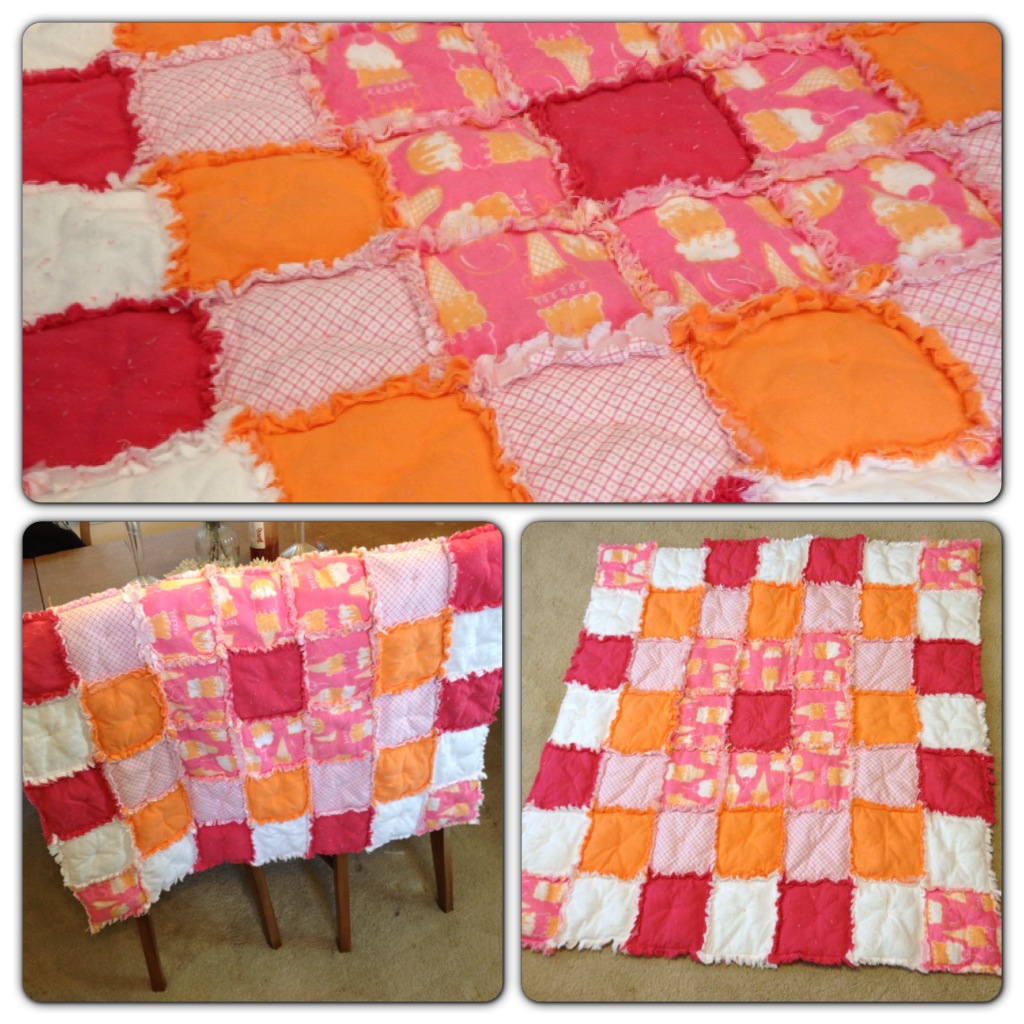
So I've made a few of these now and each time I forget how much work is involved! But the end result it totally worth it!

The ones I made before were queen size and I used 2 yards of each kind of fabric. This one was meant to be smaller since it is for a tiny human. I only got about 1 yard of each kind of fabric. I used all flannel for this one and I really think that turns out better, but you can use anything else, just as long as its cotton.  If you don't know how much fabric to get, just figure out how many squares you want it to be and how big each square should be. I cut my squares to 6x6 and it ended up being 7 squares x 7 squares, so 42"x42". You will also need batting. I got 100% polyester batting, but I don't really love working with it. If you can get the softer bamboo batting, it is MUCH better.  Cut those squares too, 1" less than your fabric squares.

1. Sandwich the batting between two fabric squares and lay out your pattern. The hubby and I went through a couple different options before we settled on a good lay-out.
2. Sew each square sandwich together. Usually, you would use your machine and sew a big X in the middle of each one. I didn't want to do that for this quilt, so I just hand-stitched a tiny little x in the middle and it worked just fine. The point is for each square to hold together.

3. Once your squares are put together, you are ready to put together your rows. Just follow the pattern you decided on. I recommend taking a photo of that like I did, so you have a good reference in case your squares get mixed up, which mine did.

Since you want the rough edges to show, sew them "backs" together along one edge. Keep going with each square until you have a row. Then do the rest of the rows.


4. Follow the same instructions, but now you are sewing the rows together. Make sure to match up the squares as much as possible. If they are a little off, it's fine. It'll turn out OK when you do the "rag" step.

6
I would recommend giving yourself a lot of room for this, especially if you are doing a larger quilt. You will need room to feed through the sewing machine and you'll need room to the left as you add each row. I was fine for this smaller quilt, but when I made the queen size, I had to have my hubby hold onto the overflow.

5. Once you have all the rows sewed together, do a final stitch around the outer edge of the quilt to close it out. You can use a regular straight stitch, but I like to use the zig-zag stitch. It holds it nicely and provides a decorative element since it will be seen.
6. This is the worse part, I'm not going to lie. You need to go around and cut little snips out of all the raw edges you have exposed. All the way around the outside and each square inside. This takes awhile and more often than not, my index finger will get a small blister and start to go numb. Again, this is where it helps to have someone available to take over if you can. Usually I get the hubby to help, but this time my 3-year-old eager beaver helper wanted in. Since I was using my big fabric scissors and not his usual safety scissors, I did it with him for a couple squares before he gave up. He really wanted me to share though. ("You don't have your scissors here, JJ." "Share, mommy. Please." I couldn't say no...)

7. Last step! Wash your quilt. When you wash and dry it, all those exposed edges start to curl up and get all raggy. Hence "Rag Quilt"! It is a cute way to make a quilt and pretty easy not to mess up. I'm a really lazy pinner and measurer so this is perfect for me!


Project 3: Crafting for Baby Kathryn's room

 I actually saw a lamp I really liked for Kathryn's room, but it was very expensive. I had already purchased quite a bit of this cute princess fabric for a project I ended up abandoning, so that is what inspired me to do this lamp recovering.

1. I bought a fairly cheap lamp at Target
2. I removed the pom-poms at the bottom of the top tier. Since these shades are perfectly round, it was easy enough to just measure it around directly and cut out the piece I needed.  I had to double up my fabric because it was a bit thin and you could see the original pattern through it. I laid the fabric in place and hot glued all the way around and up the crease.

3. I repeated the process for the bottom shade too.  Pretty cute, right?


Project 2: Crafting for Baby Kathryn's Room

This one is even easier than the first one!

To make this cute little silhouettes, I just did a Google image search for the character and "silhouette." I printed it out and used them as stencils to cut out of the colored cardstock I wanted.  Then I just framed them.

The cool thing about this particular "craft" is that the frames I used were from JJ's room before we changed it from Dr. Seuss to Superheroes.  I just sanded off the color and repainted them Cream. I didn't really think it was going to work at first, but it did and I was so happy with it!

Project 1: Crafting for Baby Kathryn's room!

The first project I made for my upcoming little girl's room was a canvas initial.  This was a super easy project.

1. Just get a canvas the size you want. The one I used is 8x8 and I picked it up pretty cheap at Aaron Brothers. I think you can get them at Michaels too.
2. Paint it the color you want.
3. Add the initial in a different material. I've seen people use buttons and that is SUPER cute. I had these little flowers in my scrapbooking stuff, and they were the perfect color.
4. Definitely lay out your letter first. That way you get the spacing right and you know it will look like how you want it to look.

5. Once you have it mapped out, take it off the canvas and brush on some Mod Podge. Just do small sections at a time so it doesn't dry out.


Anytime you can get your 3-year-old to "help" I highly recommend it. It really helps things move along nicely :0)
 
 6. After I had Mod Podged my canvas and added a few decorative details, I had my handy hubby drill a couple holes in the top so I could hang it.

7. Hang it up and admire your work!  What do you think?

Friday, December 23, 2011

Nativity Craft

Surprise, Surprise... I found this craft on Pinterest!!  It actually turned into two Pinterest crafts in one.  I am so pleased with how this turned out; I think other than my first yarn wreath, this may be my favorite craft I've made. And the best part? I used everything I already had. This craft didn't cost me a thing!

Here is the link to the original: http://www.gingersnapcrafts.com/2011/12/omtwi-finale-block-nativity-set.html  As you can see, hers is a bit more subtle in the colors, but it is quite beautiful. I personally went a bit more Christmasy. I also didn't have the vinyl stencils she was talking about. I'll show you what I did instead.

1. I was going to go to the craft store for some wooden blocks, but I noticed some spare 2x4s the hubby had in the garage. Since this wood isn't really "nice" enough to build something substantial, like furniture, it was actually perfect for this craft. That's the key, if you are buying wood to use, it doesn't have to be expensive. This is a craft that is OK to look a bit rustic and since it doesn't have to be super sturdy (no one is sitting on it), cheap is OK. It did require a bit of sanding, though, and it was on the dry side, so it took a few coats of paint. Truth be told, the edges of the red blocks could use another swipe of the brush.
I had my husband cut out 9 2" blocks, 1 3" block, and 3 5" blocks from his 2x4. For the stable, I needed something a bit taller, so he cut two 12" pieces off of a plank and glued them together. *Please keep in mind that if you do this, it will have to set overnight* He was trying to talk to me in "Home Depot" speak, but I wasn't following. Basically, I was only concerned with the space on the front face, where the images are going to be. As long as that is big enough and the width is wide enough for the block to stand up, I'm happy. After they are cut, sand them to your satisfaction, depending on how "rustic" you want yours to look.
2. Paint the fronts your main color. I chose a cream color, the original project made the blocks different colors. You can do whatever you prefer. Let them dry and if you need another coat, go for it. After the fronts were covered and dry, I painted the sides either red or green (sorry, I guess I forgot a photo of that step.)
 3. This is where second Pinterest craft came in. I used this idea for transfering images onto wood from this blog: http://diddledumpling.blogspot.com/2010/05/tutorial-vintage-looking-painted-sign.html. That tutorial is GREAT, especially if you are looking to create something vintage looking. However, for this particular project, I thought the images came out way too light. I could barely see them. So I just used the image that did make it onto the block as a stencil and filled it in with black paint. The stable I did freehand because that is basically just straight lines.

4. I used puffy paint to write "Oh Holy Night" at the top. I thought of other things too like "For Unto Us a Child is Born" or just "A Child is Born" or "Joy to the World" but I love the song "Oh Holy Night" and I think it is just the most perfect way to describe the Nativity setting.

5. This little star is also something I had in my crafting supplies and just painted it a simple gold color. I used the same gold puffy paint I used for the letters to add little accent lines to the star. Then I just used my trusty glue gun to attach it to the top. You could probably put it anywhere. Since I was putting it right on the top, I made sure to add a little glue to the back for stability.
6. That's it! You're done! It seems like a lot of work, but I actually got it done in an afternoon (well, technically my husband cut out the blocks the night before). It's cute, right?

Happy Crafting and a very Merry Christmas!!!

Wednesday, December 14, 2011

Christmas wreath and garland

I am such a fan of Christmas! I love, love, love it!! I love decorating my family room, hanging our stockings by the chimney with care, putting up our wreath, decorating our tree. It is so beautiful!  This year I finished with the everyday decor in the den, so I needed something to put in there. JoAnn's was having a HUGE sale on Christmas decorations so I went crazy and this is what I came up with:

1. Gather your supplies


2. I used a foam wreath. Normally I don't use this particular kind because they are a bit pricey and you can make them cheaper by using plumbing foam instead, but since they were 50% off and I didn't want to make a trip to the hardware store (not like my husband couldn't have used the excuse!) I went ahead and got it. The extra long plain garland was also on sale, so the combo was cheaper than buying a pre-made plain wreath. I just kept wrapping the garland around the wreath, gluing as I went, and it got bigger and fuller as I wrapped. Don't worry if there are extra spaces, you'll cover them up with fun stuff.

3. I rummaged through the flowers and the mini decoration bins and found a bunch of cute things to put on my wreath. The little peppermint candies and the berries were 50% off and only .79 to begin with! What a steal!

4. Using the same garland... well, the same type, obviously a different garland! I doubled it up to make it fuller. I glued randomly down the line so it would stick together.
5. I used the same theme for the garland as I did for the wreath. For the berries, I got a garland of red beads and loosely wrapped it around the garland. I placed all my accessories and when I was happy with the results, I glued everything down. I made two of these.
6. To hang them up on the window box, I re-bent some ornament hooks that I already had (.99 for a box of way more than I need!) and made them into double-ended hooks, one end hooked over the top of the window box and the other hooked outward for the garland to hang on. To hand the wreath, I used the 3M Command wreath hanger that will just come right off when the holidays are done. The hook can be used over and over again, just with new sticky stuff.

7. I was very pleased with the results and it is something I can put out every year!

What Christmas crafts are you doing this year?

Merry Christmas and happy crafting!

Monday, November 21, 2011

Thanksgiving Wreath

My goodness, it has been a whole month since I posted something! I have lots of pictures of the things I do to share here, but apparently I've been doing a lot of "doing" and not a lot of "sharing"!!!

This is the wreath currently hanging on my door. It is perfect for the holidays and it couldn't be any easier!! It is even easier than the yarn wreath and less time consuming too because you don't have to spend the time wrapping the yarn around anything.  It really only takes the amount of time you need to lay out your design.

For this wreath, I bought the plain branch wreath form instead of the Styrofoam.  I also just browsed through the silk flower section of the craft store and picked out the flowers that were the most Fall like to me. I also found a cute fall ribbon to use. 

I got married in the fall and made use of a lot of fake fall leaves because, lets face it, I couldn't depend on nature in Southern California!  I still have a ton left over so I included some of those too.

1. Just lay your bare wreath on your workspace. Start laying out your flowers. I took the stems off of mine because I didn't need them, but if you need them, keep 'em on!

2. Using your hot glue gun, start gluing everything down. This is a bit tricky because there is a lot of open space in the wreath that wasn't there in the yarn wreath, just try to finagle the flowers and the glue in the spaces. It is easier than it sounds.

3. Tie your bow. If you  have your own tips and tricks for this, please use them (and share!!) but I just did my version of this video tutorial I found on YouTube: http://youtu.be/hS7hK9dau50


(I saw this little accent at the store and thought it was the cutest thing!! A nice little vintage accessory for my wreath!)

I hope you like this wreath and I can't wait to see what you create!

Happy Thanksgiving and Happy Crafting!

Sunday, October 16, 2011

Mini Shadow Box

My brother just got married and the theme of their wedding was what inspired this little craft. You can do whatever theme you want, though.

They had a "Tiffany's" themed wedding from the iconic blue to diamonds on the table. They even had their flowers in Tiffany's boxes as the centerpieces.  My son was the ring bearer and he carried a little Tiffany's box when he walked down the aisle (he actually RAN down the aisle, but it was cute anyway :0)) That is the box I used to make this project.  It is a quick craft too; I completed it while my son took his afternoon nap.

Gather your supplies:
You'll need glue and/or Mod Podge (my love affair with M.P. continues), hot glue and whatever you are going to put in your shadow box. I used the Tiffany's box, the fake diamonds from the table and the wedding invitation.

It is easiest to do one side of the box at a time then put the two halves together. I started out by cutting out the numbers for the date they got married to put  on the front edge of the box. I put a light layer of M.P. on the box then put the numbers on top, so they stick. Then I brushed on another layer of M.P. over the numbers. The M.P. goes on white, but don't worry, it will dry clear. I did the same thing in the inside of the lid, except with the letters "J & C."
I wanted the inside of the box to have the same pattern as the invitation, so I used the fluff piece inside the box to measure my paper piece. If you are using a box that doesn't have the fluff piece, you can just measure the inside of the box with a ruler and cut the paper out.

Then, spread hot glue on the fluff piece. I opted to keep mine in the box because I liked the lift it gave, but you can not use it if you want. Put the paper you cut out on top of that.
I printed out a picture of the bride and groom and lined it up on the wedding invitation. I glued it down and cut it out. This made it stable, like cardstock. I also M.P.'d over the image to make it even sturdier.

The picture was lined up so you could see their names from the invite on the back.


Then I lined up the photo on the paper that is attached to the fluff piece that goes in the bottom of the box. I used an exacto knife to cut a small slit the length of the photo.


Now you can add hot glue to the bottom of the box and put in the fluff piece. Put the photo into the slit you just created. I added a small line of hot glue just behind the photo too, to help keep it upright. Then I put the hot glue randomly in the space left and placed the diamonds all around. I suggest dry fitting anything like before gluing, just to make sure you are happy with the layout.

Now you can work on the top lid of the box. Find the center and poke a hole with your scissors. I started the whole with my scissors, but finished it off with the screwdriver so the whole was nice and round. Another option would be to see if you have an electric drill with a drill bit the size you want and carefully drill a hole. I was going to have my husband do this, but he was working and had the drill with him.

Thread your ribbon through the hole you just made. (Yes you will see that I already attached the two halves. Do as I do and not as I say. I promise it will make your life much easier :0)

I had set aside two little diamonds and used them to adorn the top of the box. just hot glue those down. It is at this point that you should be safe to attach the two halves of your box.

My finished product:


Now they can hang it up (Christmas tree, perhaps) or it can just be on display on a table or dresser. And using the elements from their wedding, they can enjoy the nostalgic factor as well.

I hope they like it and I hope you do too.

Can't wait to see your shadow boxes.

Happy Crafting!